Beautiful work. You are just so good at this. Thanks for all the information and tips
Hugh


Leyland Mini 1000 1980 Restoration Project
Started by
minifcd
, Aug 27 2011 08:59 PM
393 replies to this topic
#121

hughJ
-

- Members
-

- 727 posts
Soldiering Along
- Location: Highlands, Scotland
Posted 06 February 2012 - 09:57 PM
#122
sonikk4
-

- Admin
-
- 15,909 posts
Twisted Paint Polisher!!!
- Name: Neil
- Location: Oxfordshire
Posted 06 February 2012 - 10:00 PM
Cracking along nicely now Scott, those repairs have come out really well. 
#123
minifcd
-
- Members
-
- 246 posts
Mini Mad
- Location: Stamford
Posted 08 February 2012 - 09:28 PM
Thanks Hugh and thanks Neil, I'm getting there slowly.
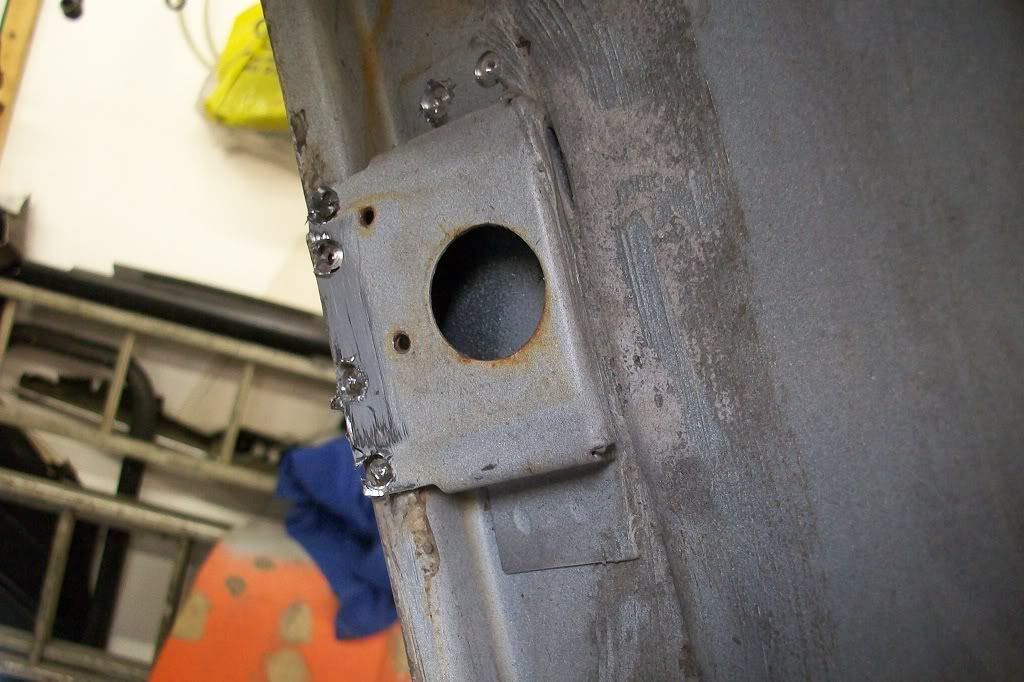
A few more little bits done. Removed the brackets on the "C" pillar that the quarter glass catches screw to, in preparation for fitting the new rear seatbelt brackets.
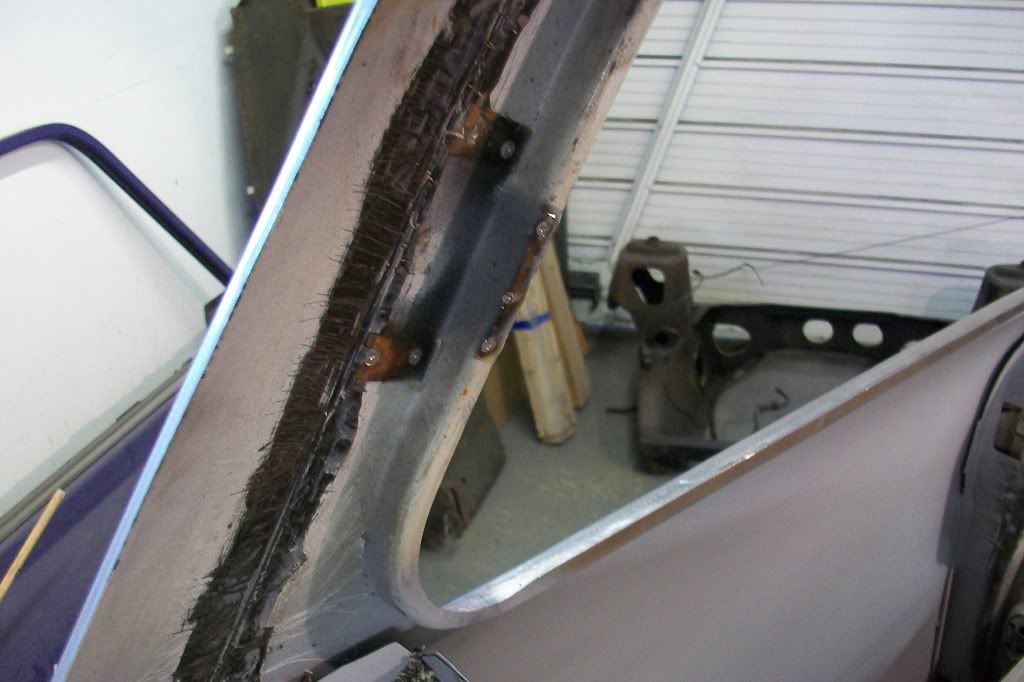
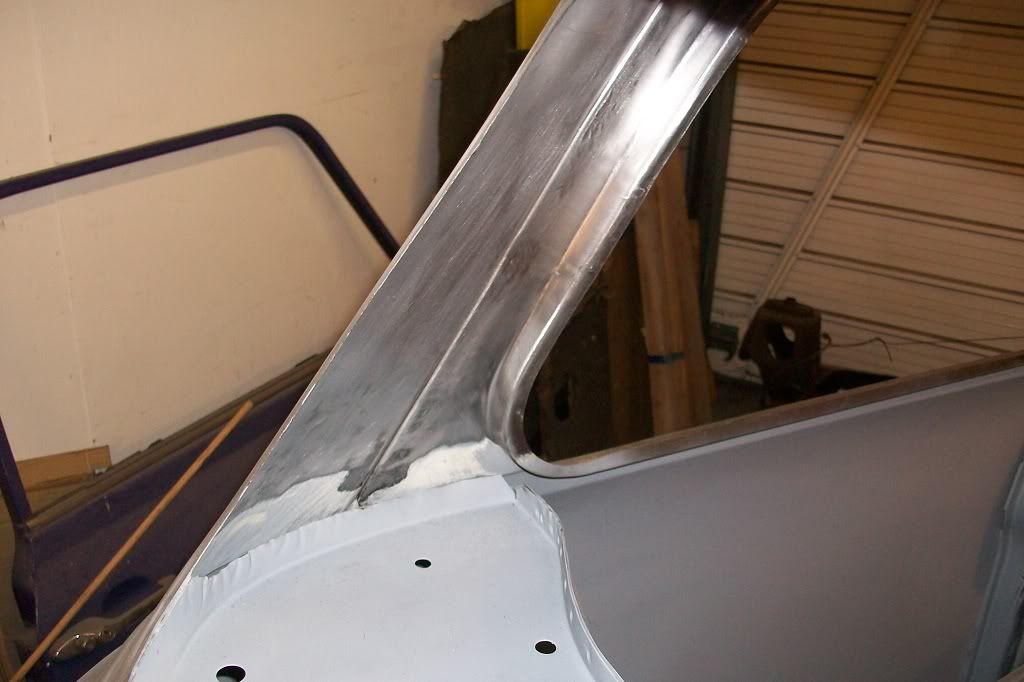
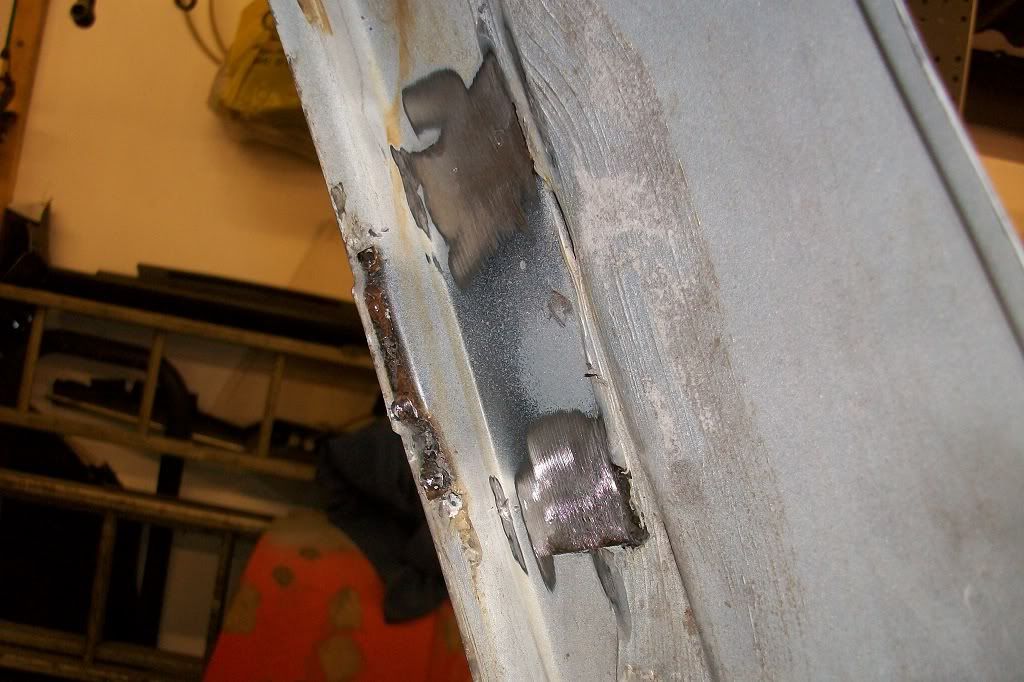
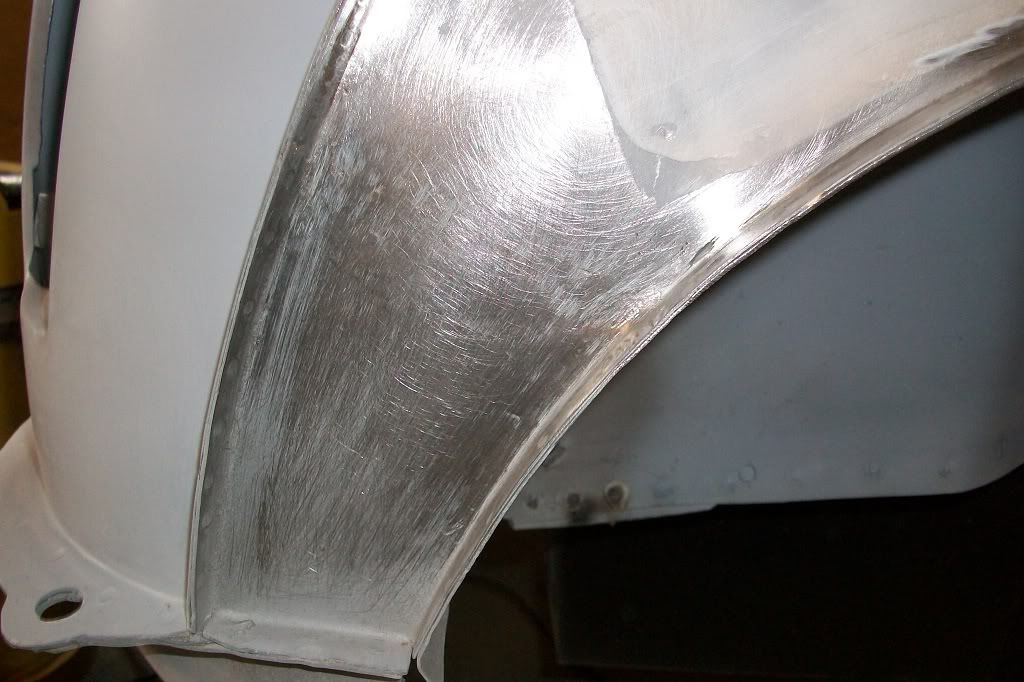
The brackets will be fitted at a later date. Next I finished blending the welds on the repair I did to the bottom of the drivers rear quarter.
Then it was back on its side to finish the passengers side sill. Jacking point fitted, Heritage part 14A8375.
Then finally got the tunnel section cleaned down.
The rear of the tunnel had quite a lot of rust and so used so rust remover gel to help sort that out.
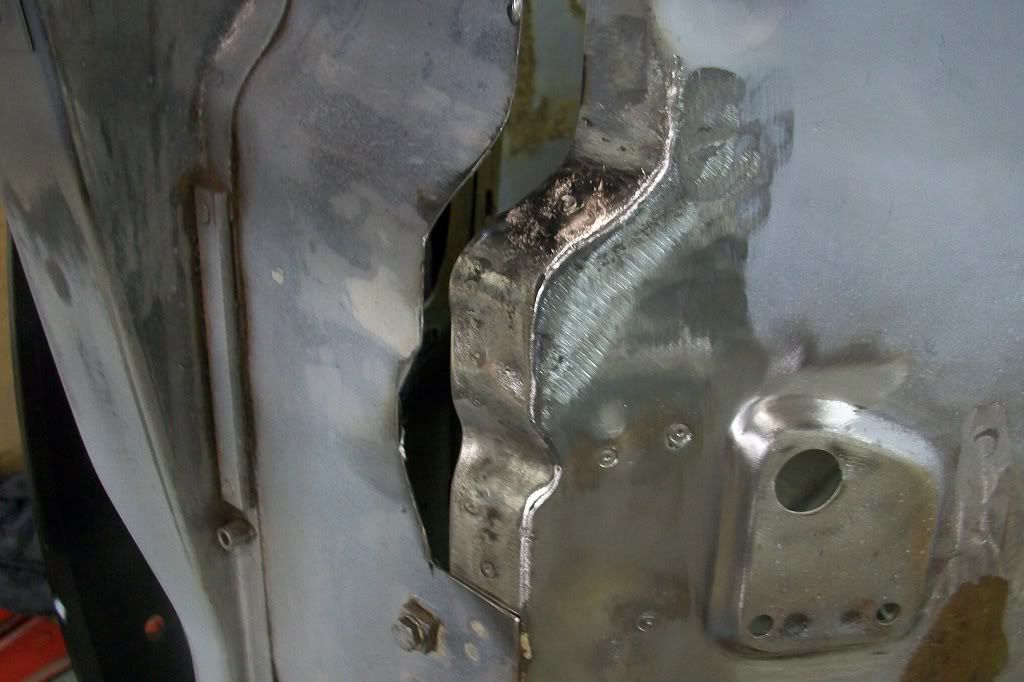
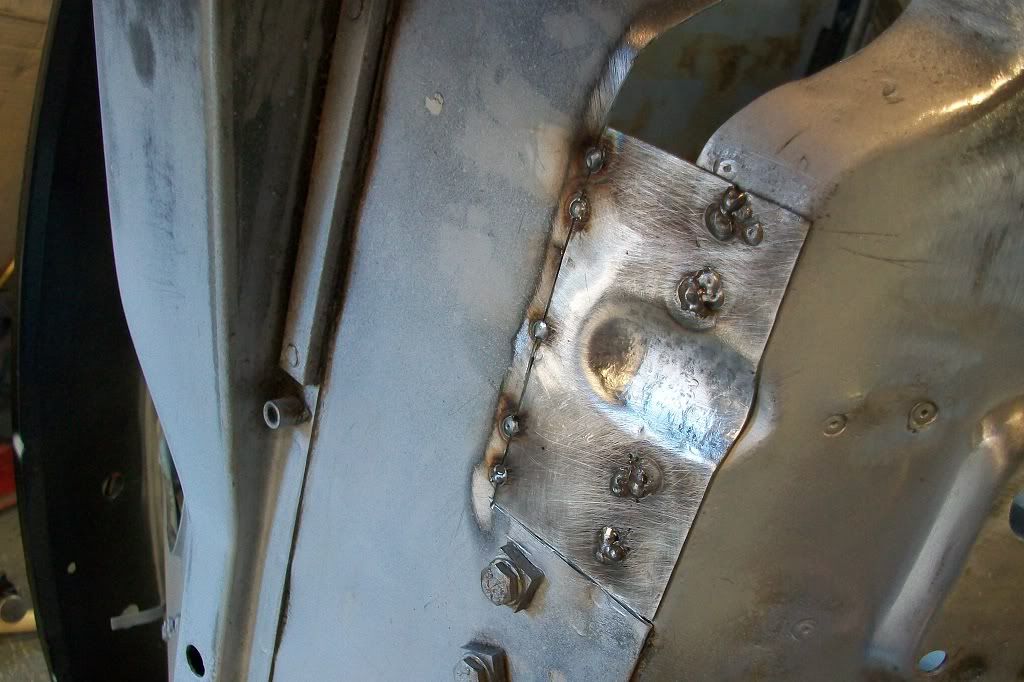
Got the welds ground down on the subframe mounting bracket of the heal board.

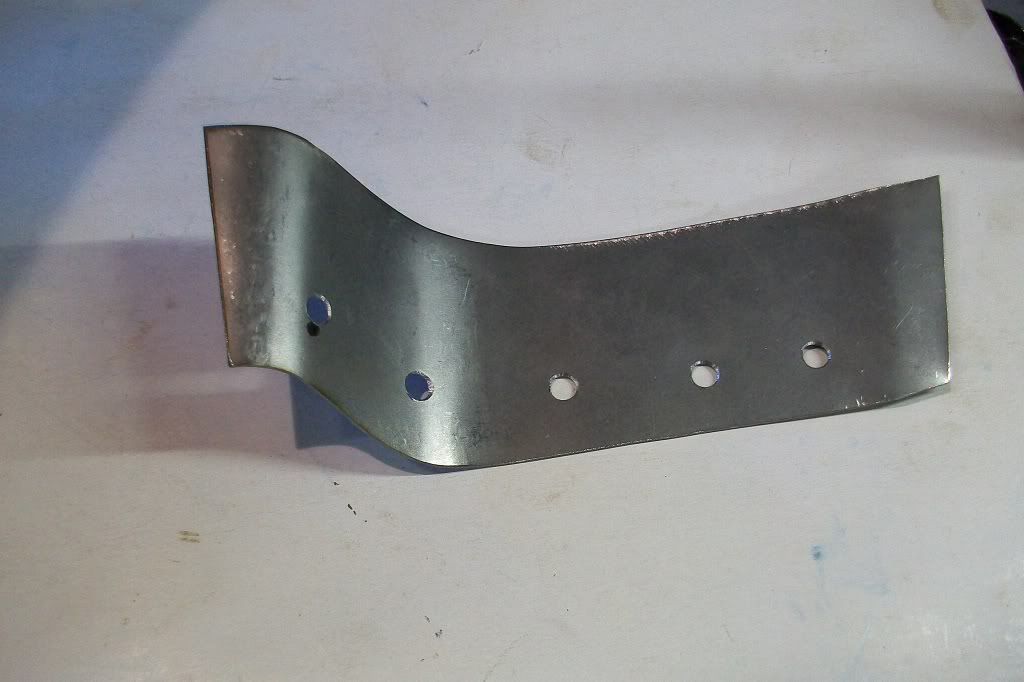
Then made the rear reinforcing bracket.
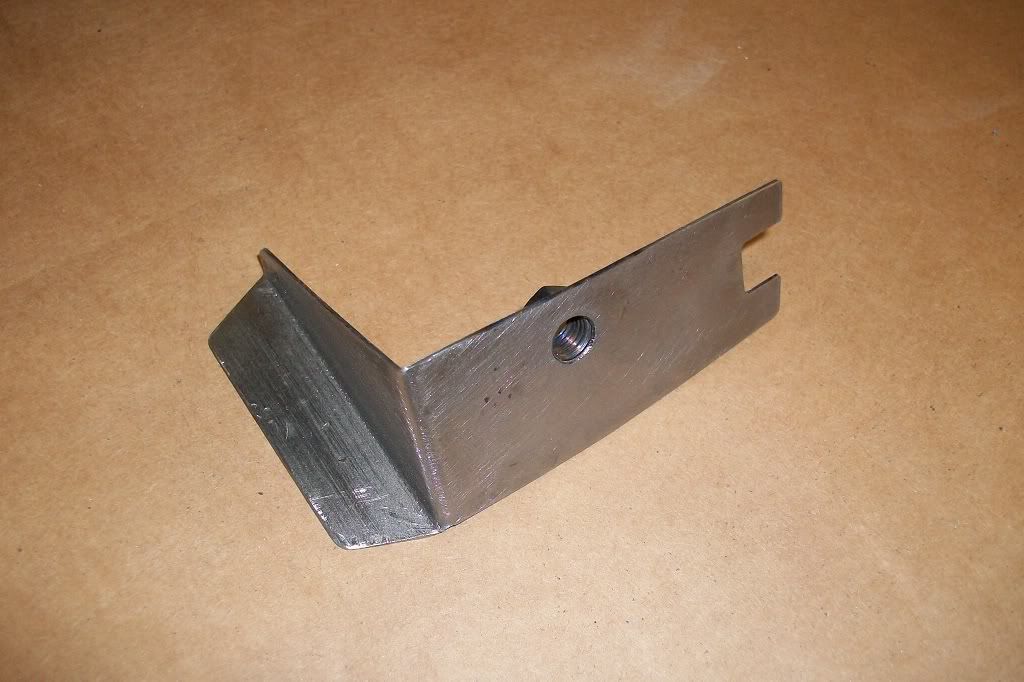
Then welded in place.
Thats it, only small jobs, but every little bit helps!
A few more little bits done. Removed the brackets on the "C" pillar that the quarter glass catches screw to, in preparation for fitting the new rear seatbelt brackets.
The brackets will be fitted at a later date. Next I finished blending the welds on the repair I did to the bottom of the drivers rear quarter.
Then it was back on its side to finish the passengers side sill. Jacking point fitted, Heritage part 14A8375.
Then finally got the tunnel section cleaned down.
The rear of the tunnel had quite a lot of rust and so used so rust remover gel to help sort that out.
Got the welds ground down on the subframe mounting bracket of the heal board.
Then made the rear reinforcing bracket.
Then welded in place.
Thats it, only small jobs, but every little bit helps!
#124
hughJ
-
- Members
-
- 727 posts
Soldiering Along
- Location: Highlands, Scotland
Posted 08 February 2012 - 09:33 PM
Small jobs but great jobs. Looks like brand new!
Hugh
Hugh
#125
Andrew O
-

- Members
-
- 1,425 posts
Previously known as Andrewo330.
Posted 08 February 2012 - 09:43 PM
Outstanding work once again.
Come and do all the welding on my Project and i will pay you in Praise ?
Come and do all the welding on my Project and i will pay you in Praise ?
#126
grahama
-

- Members
-
- 2,442 posts
Up Into Fourth
- Location: Warrington
- Local Club: None in my area !!
Posted 09 February 2012 - 09:48 PM
I agree Hugh, brand new. Really liking your work, always neat, tidy and invisible. Keep pics comming!!
Graham
Graham
#127
deebo
-

- Noobies
-
- 61 posts
Stage One Kit Fitted
- Location: southampton
Posted 10 February 2012 - 02:13 PM
as always great work, was it just surface rust on the tunnel? what was the product that removed it please? my bulkhead has some surface rust but no bad damage and i am looking for a way to clean it down. great work man!
dom
dom
#128
minifcd
-
- Members
-
- 246 posts
Mini Mad
- Location: Stamford
Posted 10 February 2012 - 07:29 PM
Thanks Hugh. Hopefully somewhere near to brand new is what i'm aiming for if it all goes to plan.
Andrew thanks, praise is good but I prefer those bits of paper with numbers in the corner!! At my present rate there would be a 2 year waiting list too!!
Hi Graham, mini may look neat and tidy but you should see the garage!!
Hi Dom, the rust was pretty deep in places but I use Hammerite Rust Remover Gel. There may be better products but this works well for me. Paint on over rust and I usually leave for 30mins then scrub with wire brush a bit and then leave the gel to work over night. Will dry up and go crusty. Then wire wheel off and repeat as needed.
Andrew thanks, praise is good but I prefer those bits of paper with numbers in the corner!!
At my present rate there would be a 2 year waiting list too!!Hi Graham, mini may look neat and tidy but you should see the garage!!
Hi Dom, the rust was pretty deep in places but I use Hammerite Rust Remover Gel. There may be better products but this works well for me. Paint on over rust and I usually leave for 30mins then scrub with wire brush a bit and then leave the gel to work over night. Will dry up and go crusty. Then wire wheel off and repeat as needed.
#129
deebo
-
- Noobies
-
- 61 posts
Stage One Kit Fitted
- Location: southampton
Posted 14 February 2012 - 08:18 PM
cool man thanks, will add some to the ever growing shopping list 
#130
minifcd
-
- Members
-
- 246 posts
Mini Mad
- Location: Stamford
Posted 17 February 2012 - 09:40 PM
Here's the latest update on progress so far.
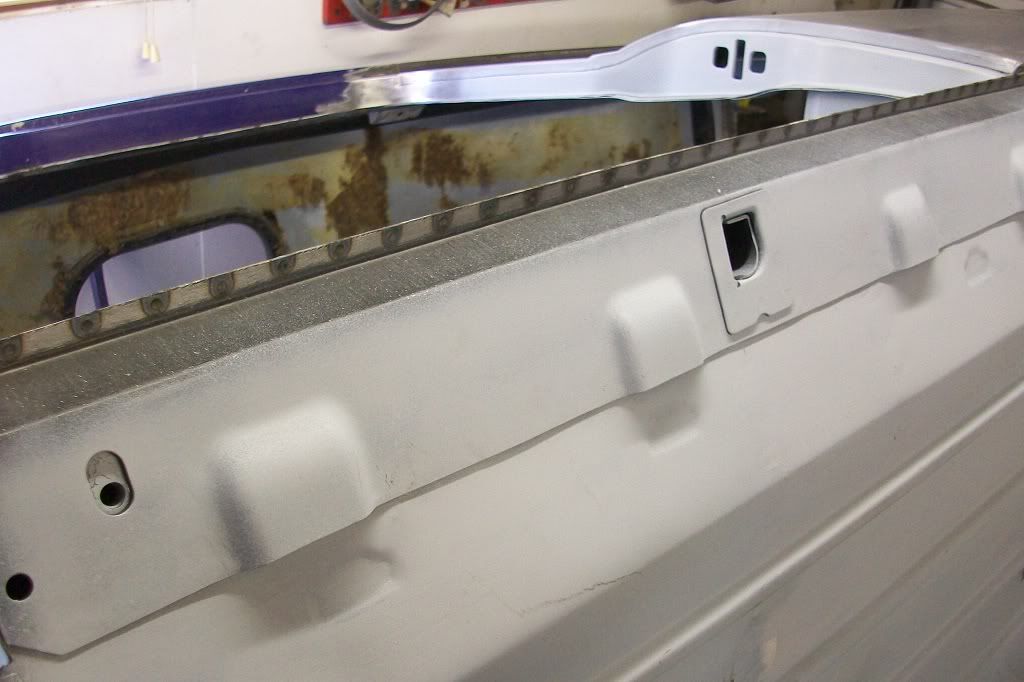
Finished welding the bottom of the passenger's inner wing.

The passenger's inner sill with all of the components welded in.
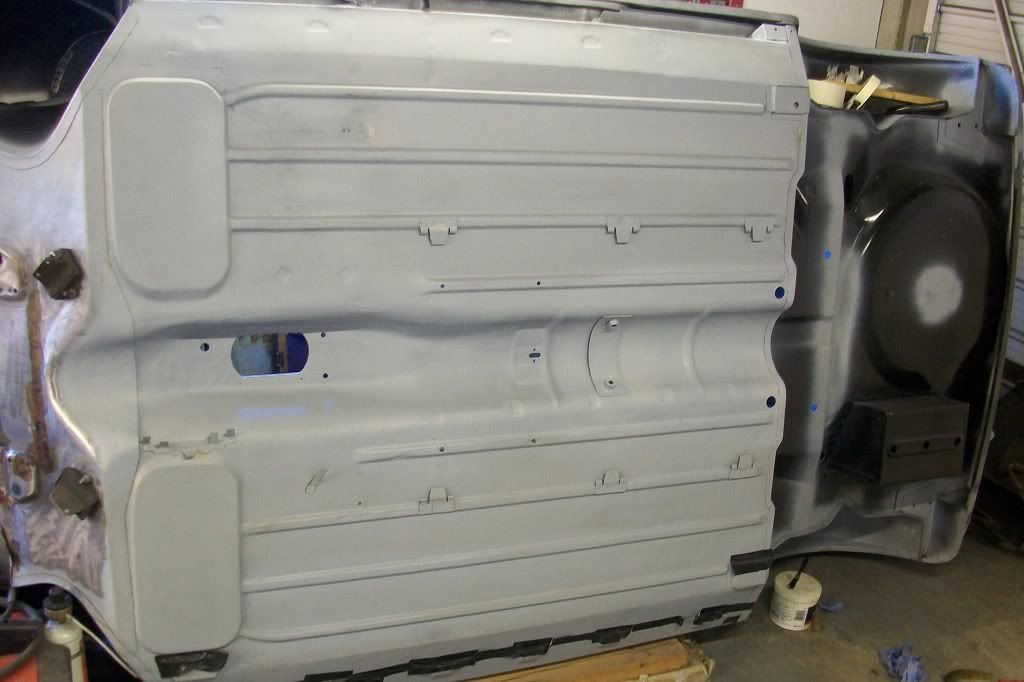
General view of the floor.
Bit of seam sealer to help keep the water out.
Then gave the inside several coats of paint.
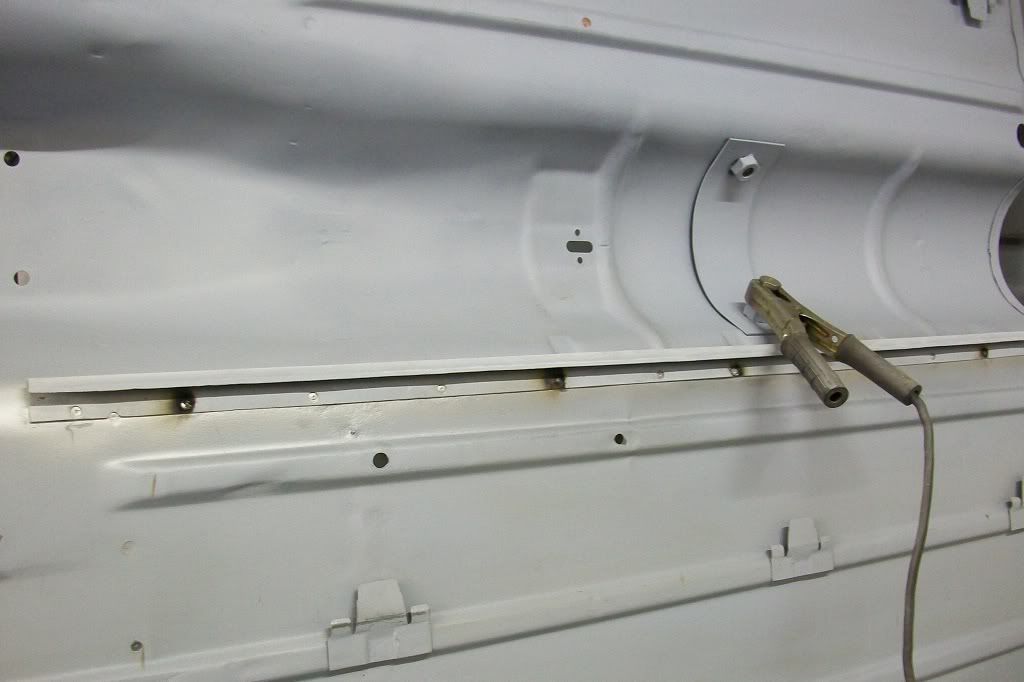
The passenger's outer sill, Heritage 14A9535, was then fitted...
And welded in.
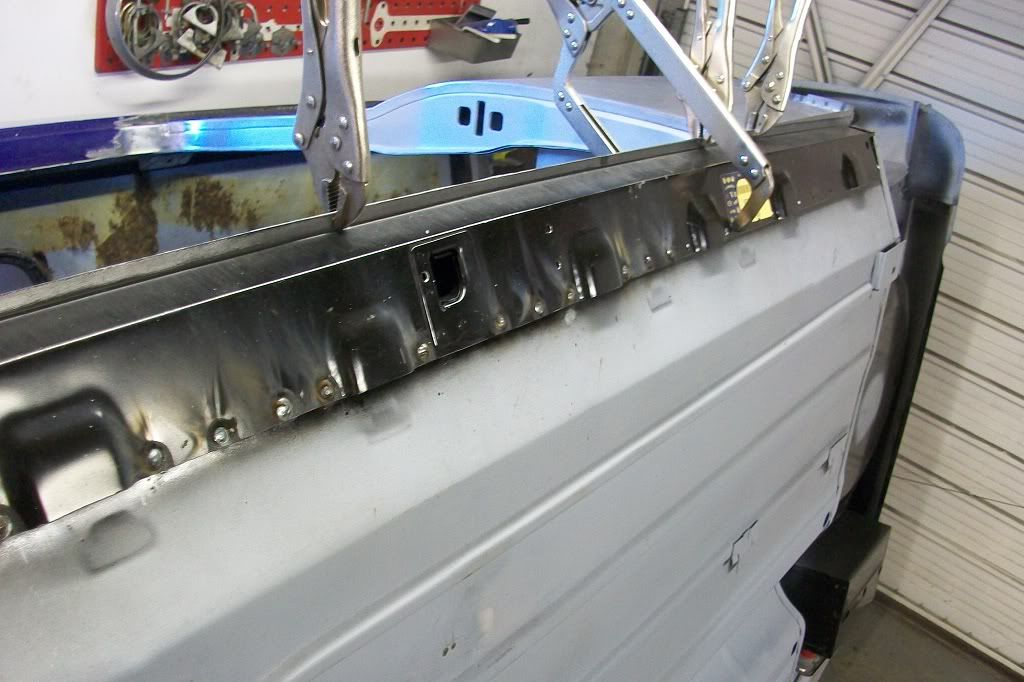
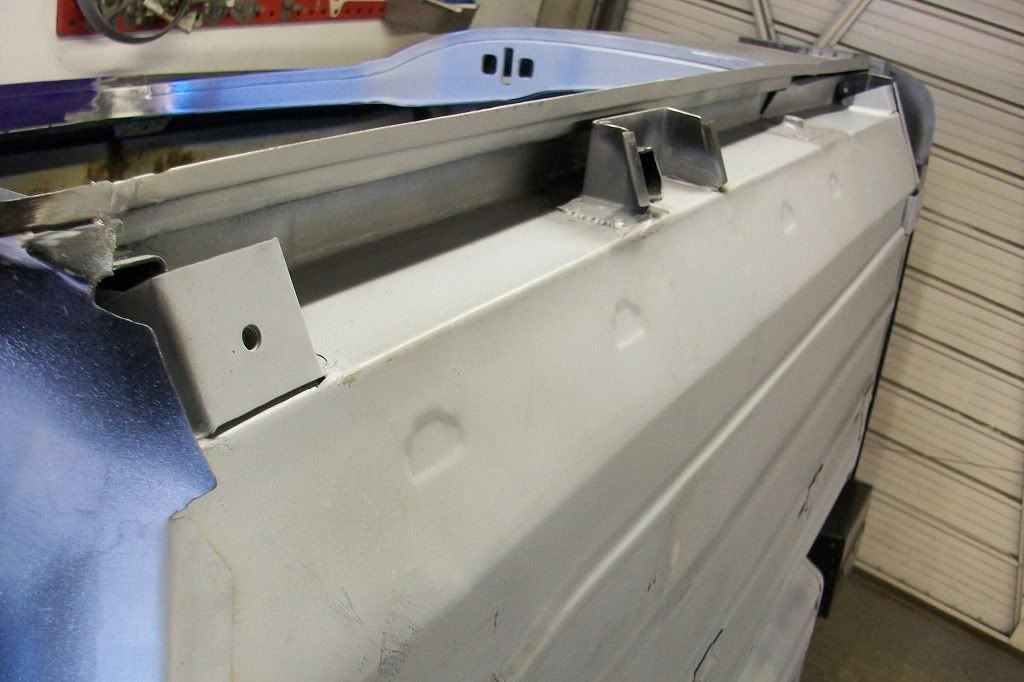
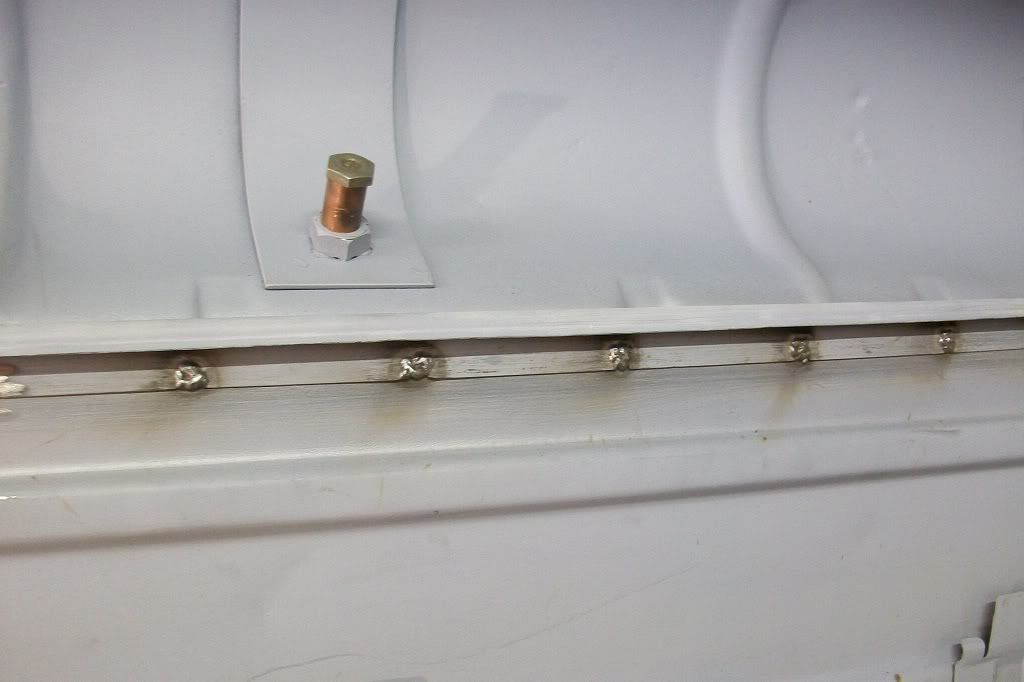
Spot welded along the door step seam.
I placed a piece of gaffa tape along the bottom of the rear quarter panel, to prevent arcing out and burning holes, should the side of the spot welder electrode decide to touch the metal.
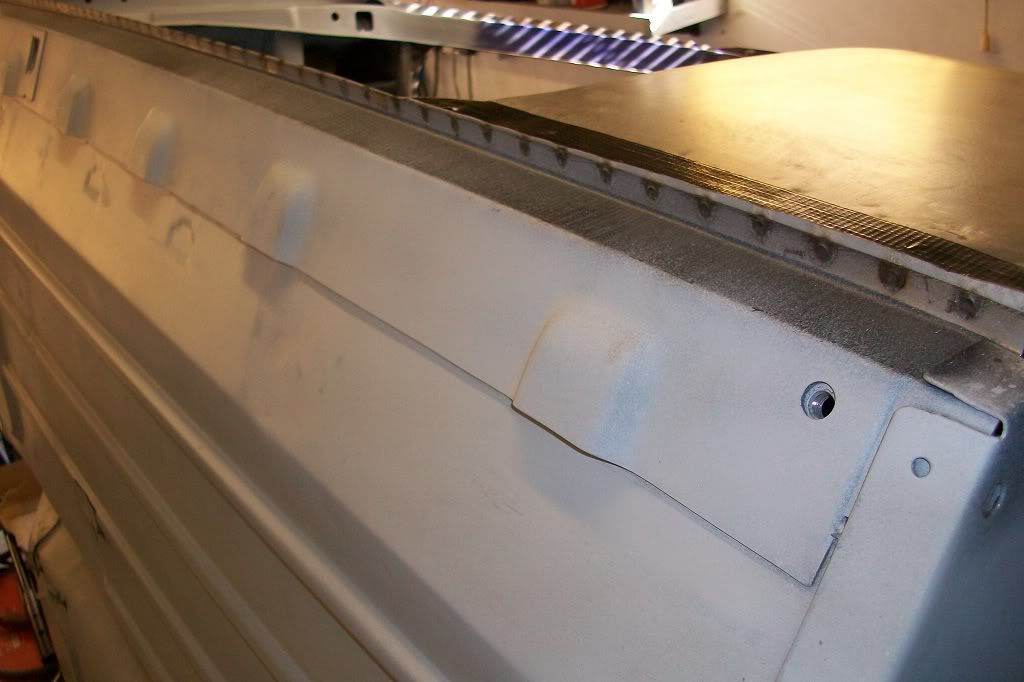
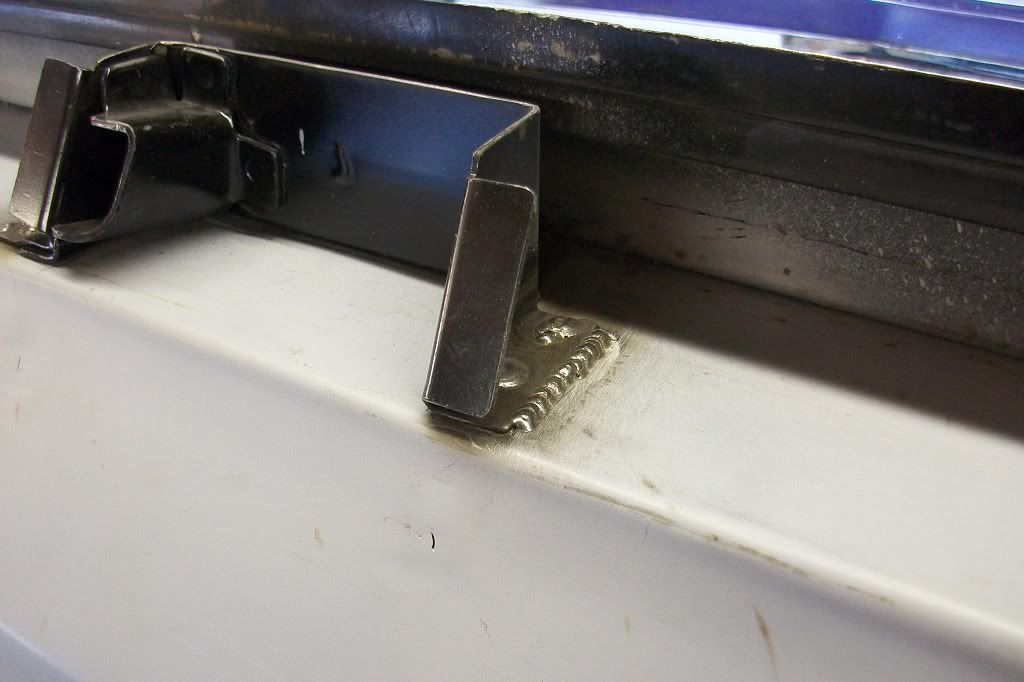
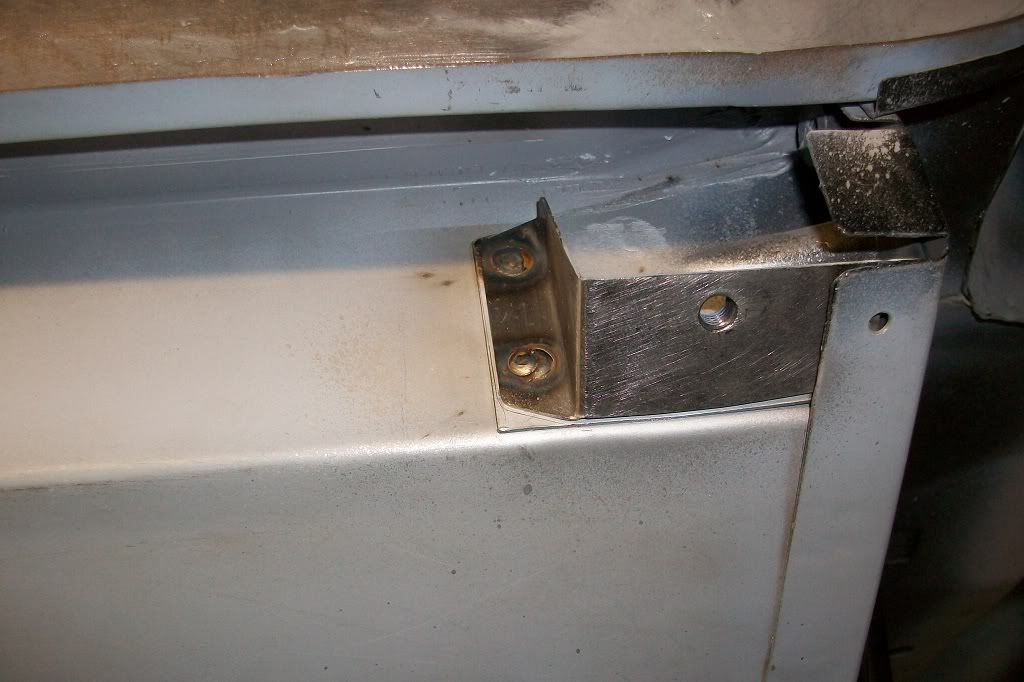
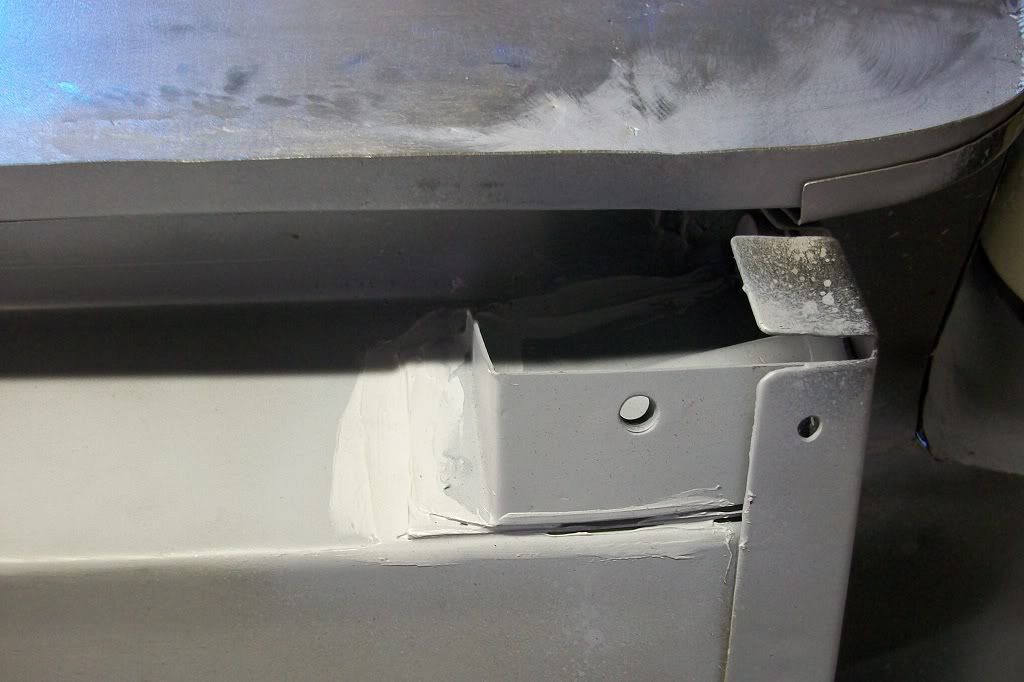
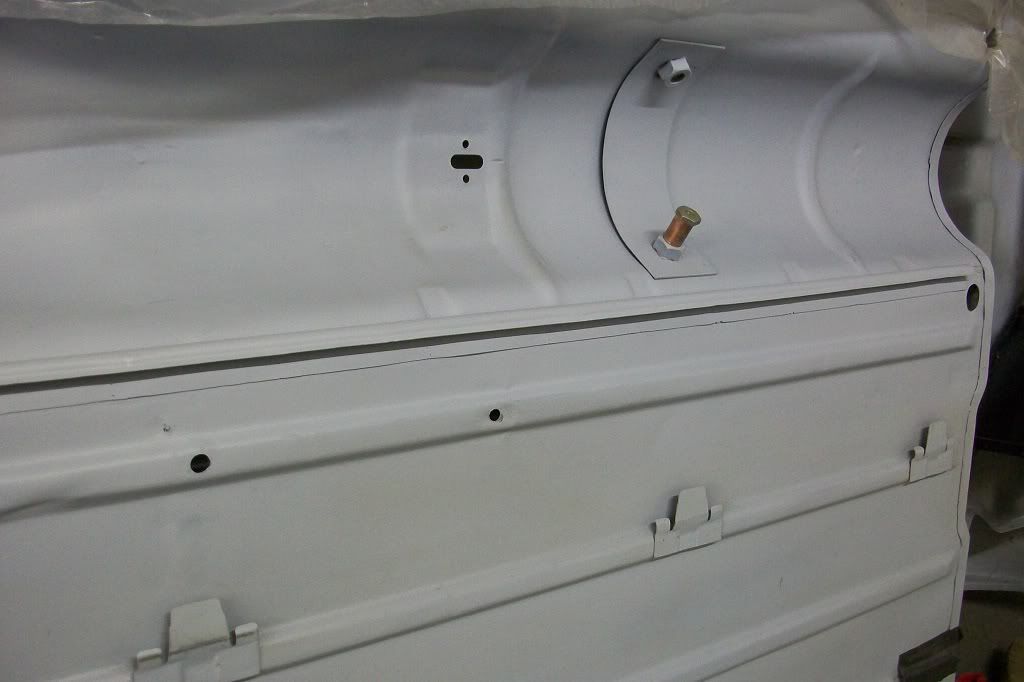
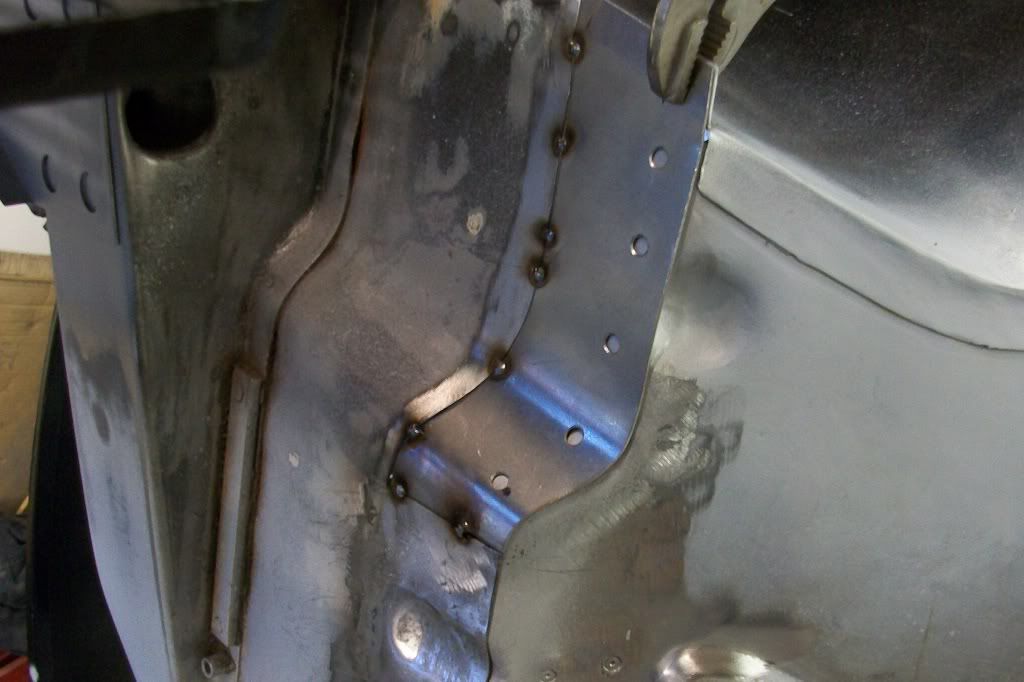
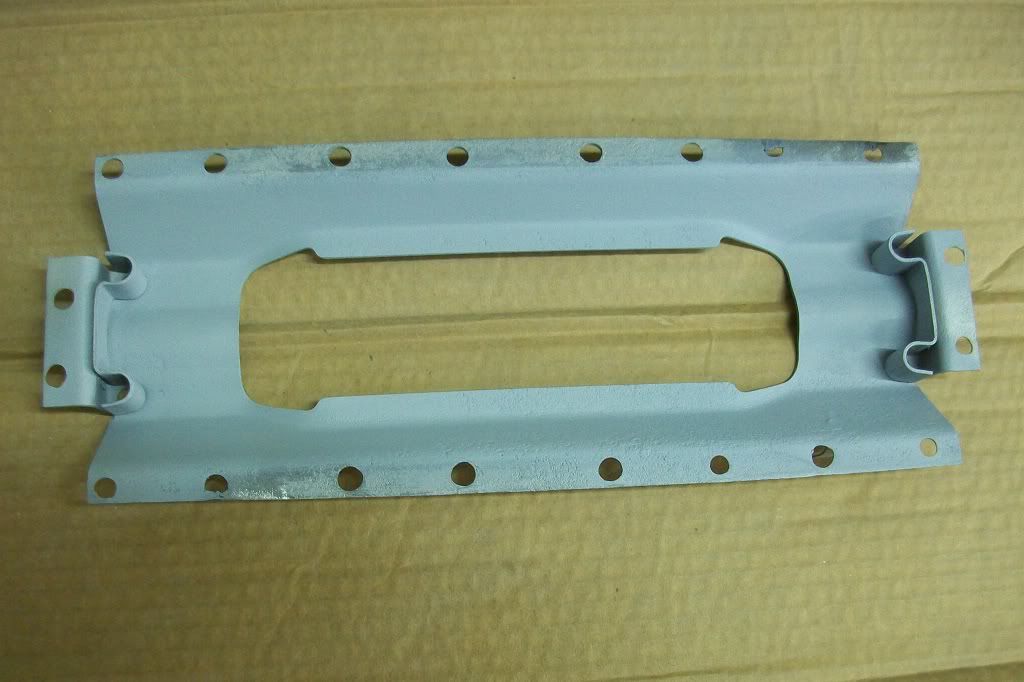
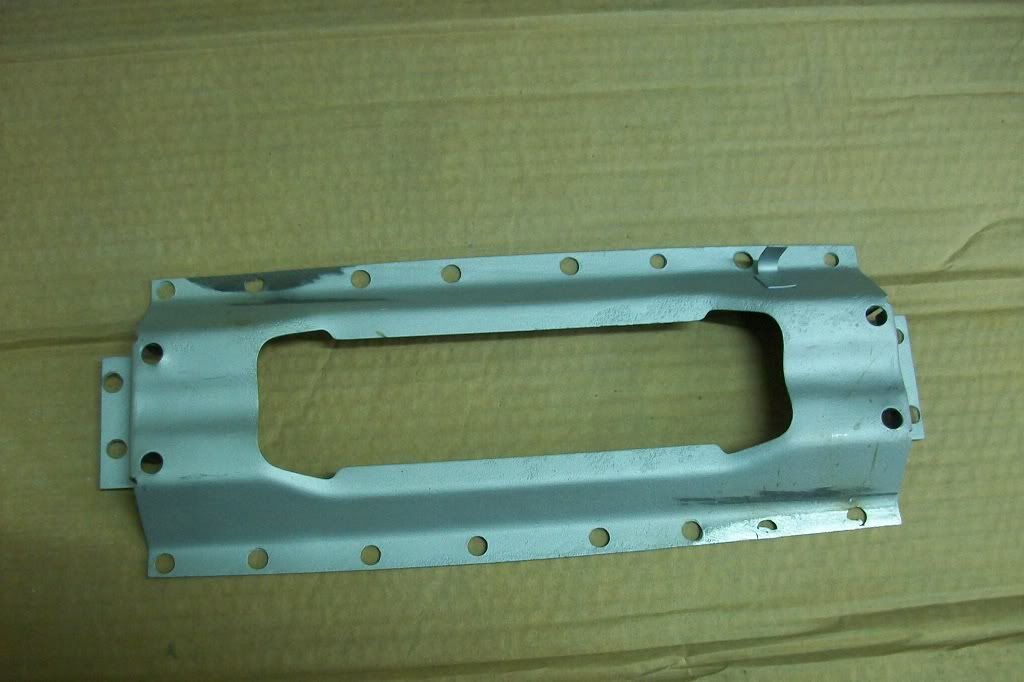
Finally welded on the reshaped slinging bracket that I made earlier.
Thats it for another update.
Thanks.
Finished welding the bottom of the passenger's inner wing.
The passenger's inner sill with all of the components welded in.
General view of the floor.
Bit of seam sealer to help keep the water out.
Then gave the inside several coats of paint.
The passenger's outer sill, Heritage 14A9535, was then fitted...
And welded in.
Spot welded along the door step seam.
I placed a piece of gaffa tape along the bottom of the rear quarter panel, to prevent arcing out and burning holes, should the side of the spot welder electrode decide to touch the metal.
Finally welded on the reshaped slinging bracket that I made earlier.
Thats it for another update.
Thanks.
#131
grahama
-
- Members
-
- 2,442 posts
Up Into Fourth
- Location: Warrington
- Local Club: None in my area !!
Posted 17 February 2012 - 10:14 PM
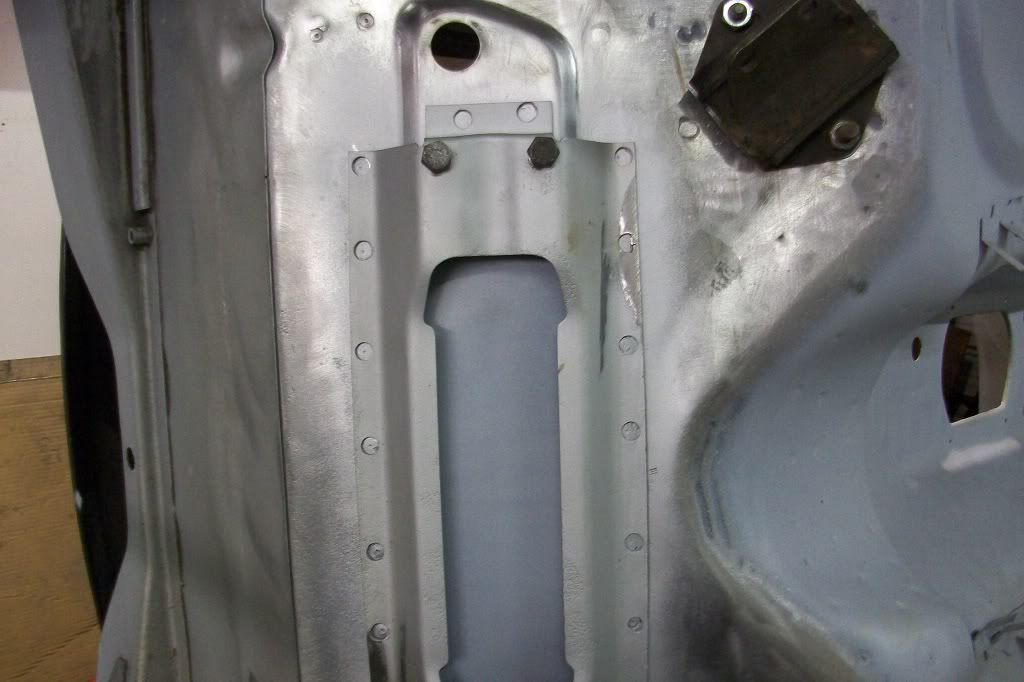
lovely as usual. Why have you put the slinging brackets back on, originality?? Leaving mine firmly off as they were full of crap and rust when I took them off.
Graham
Graham
#132
minifcd
-
- Members
-
- 246 posts
Mini Mad
- Location: Stamford
Posted 17 February 2012 - 10:23 PM
Thanks Graham, yes originality. I want everything to look as original as possible from underneath even down to fuel and brake line tabs.
#133
hughJ
-
- Members
-
- 727 posts
Soldiering Along
- Location: Highlands, Scotland
Posted 17 February 2012 - 10:42 PM
Wow, as Graham says it is lovely. Smashing work.
Hugh
Hugh
#134
minifcd
-
- Members
-
- 246 posts
Mini Mad
- Location: Stamford
Posted 24 February 2012 - 10:19 PM
Next, with the sill done, I got a few of the smaller jobs done. Fitted the new fuel pipe clips.
Then welded back on the battery cable channel that I removed to clean.
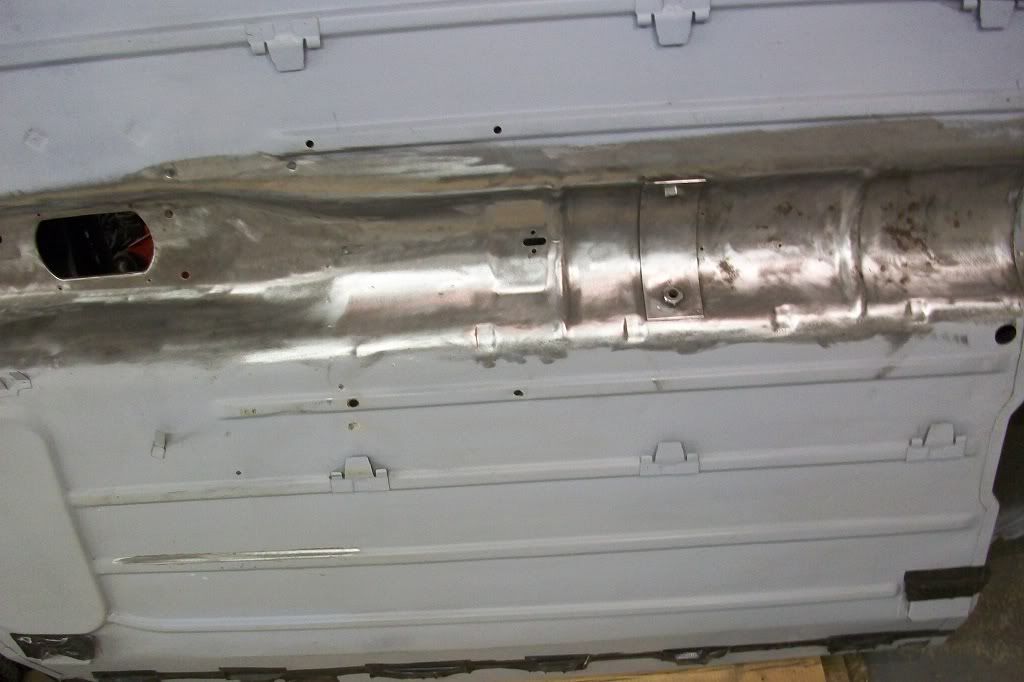
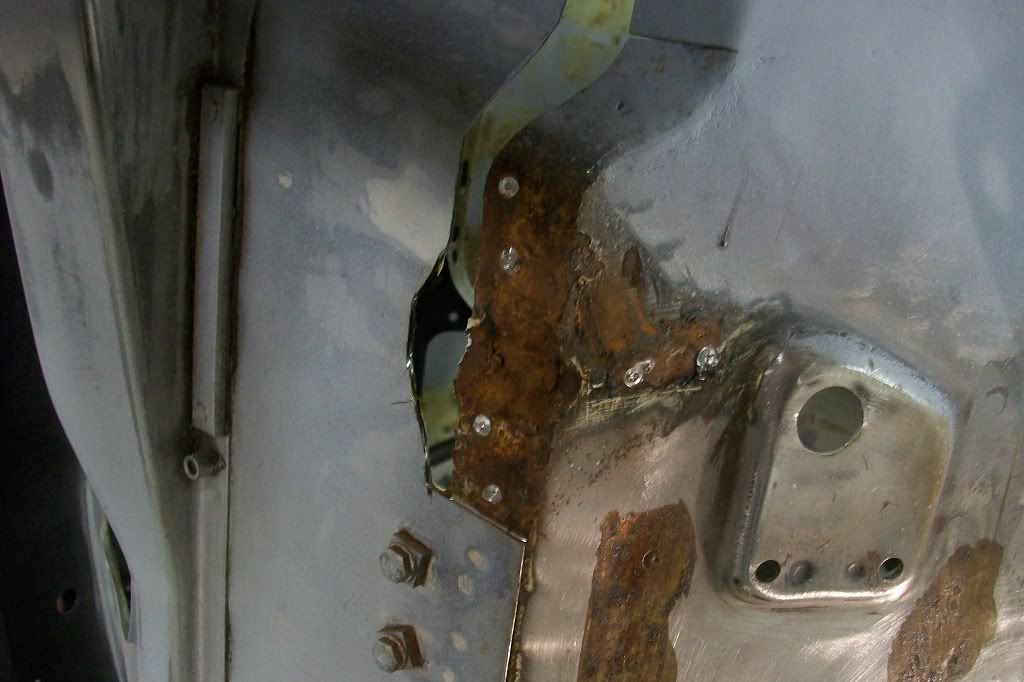
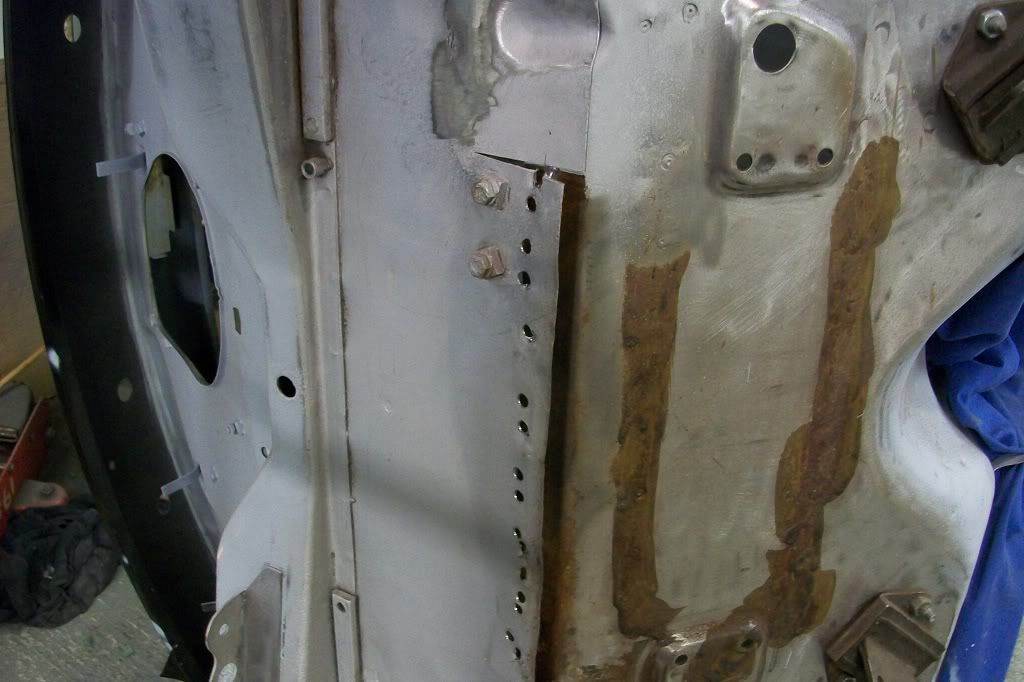
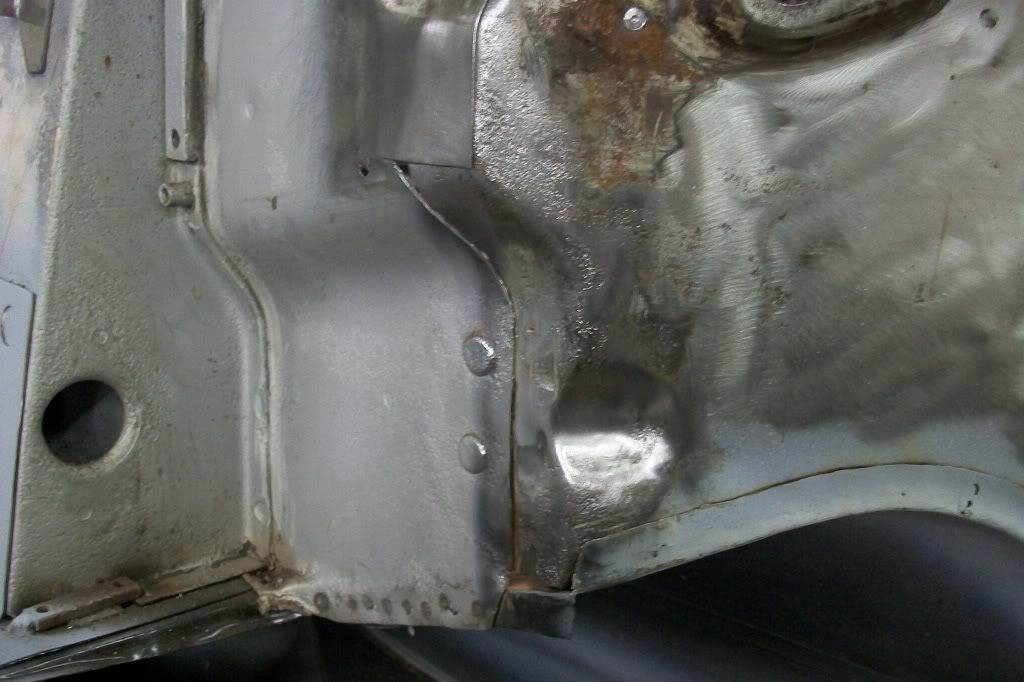
Then started on the rust at the bottom of the bulkhead.
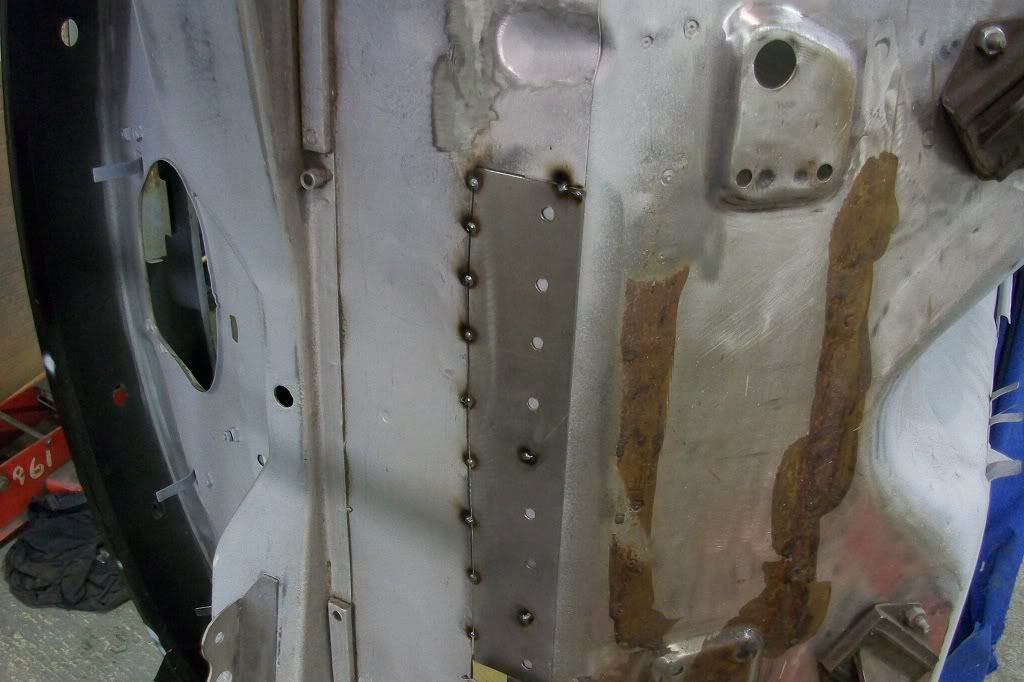
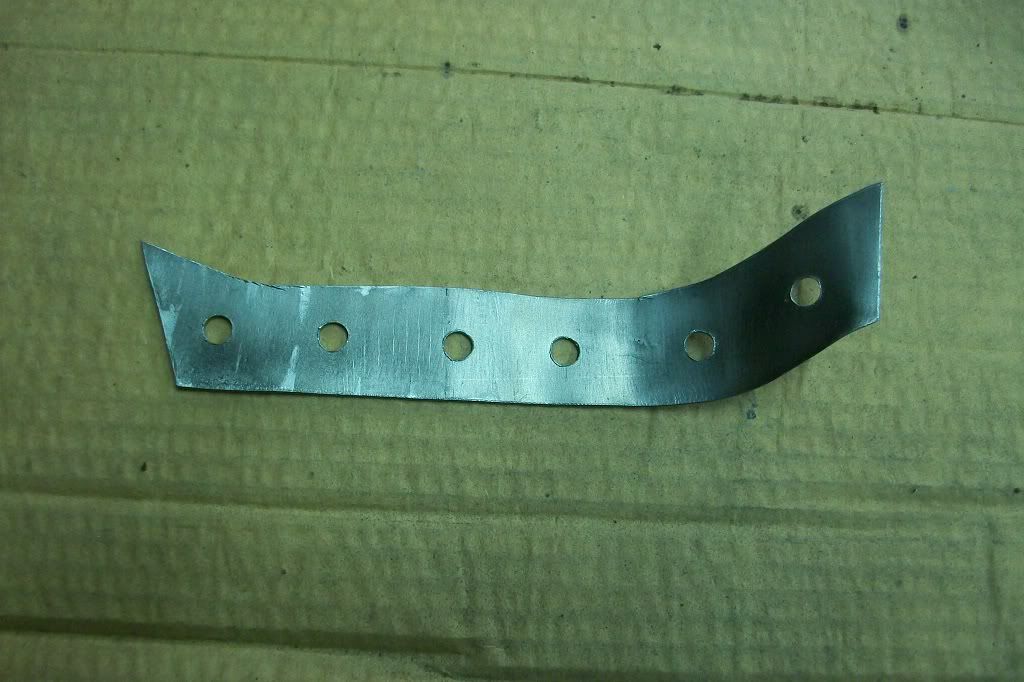
Repair piece.

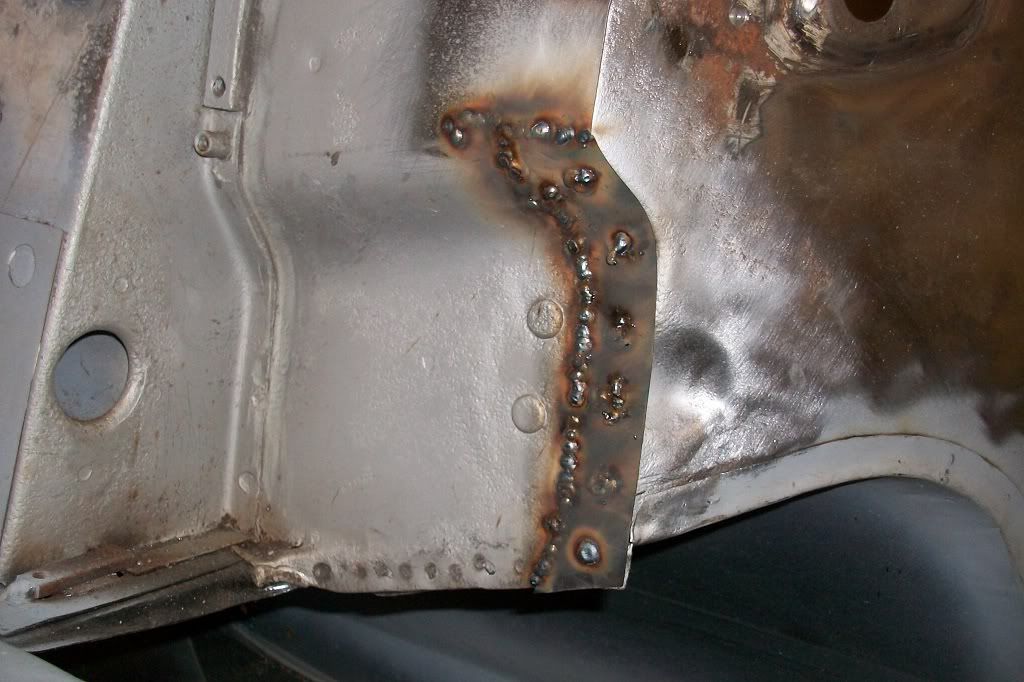
Welded in.
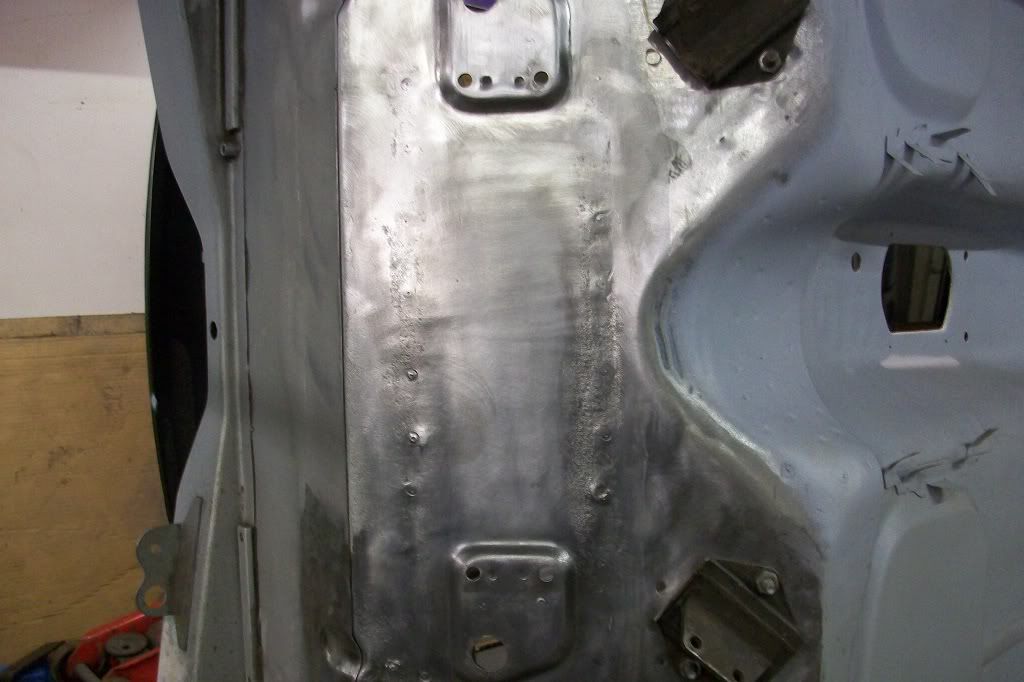
End repair.
Middle section repair.
I'll add the rest soon.
Thanks.
Then welded back on the battery cable channel that I removed to clean.
Then started on the rust at the bottom of the bulkhead.
Repair piece.
Welded in.
End repair.
Middle section repair.
I'll add the rest soon.
Thanks.
#135
minifcd
-
- Members
-
- 246 posts
Mini Mad
- Location: Stamford
Posted 25 February 2012 - 09:07 PM
Part 2.
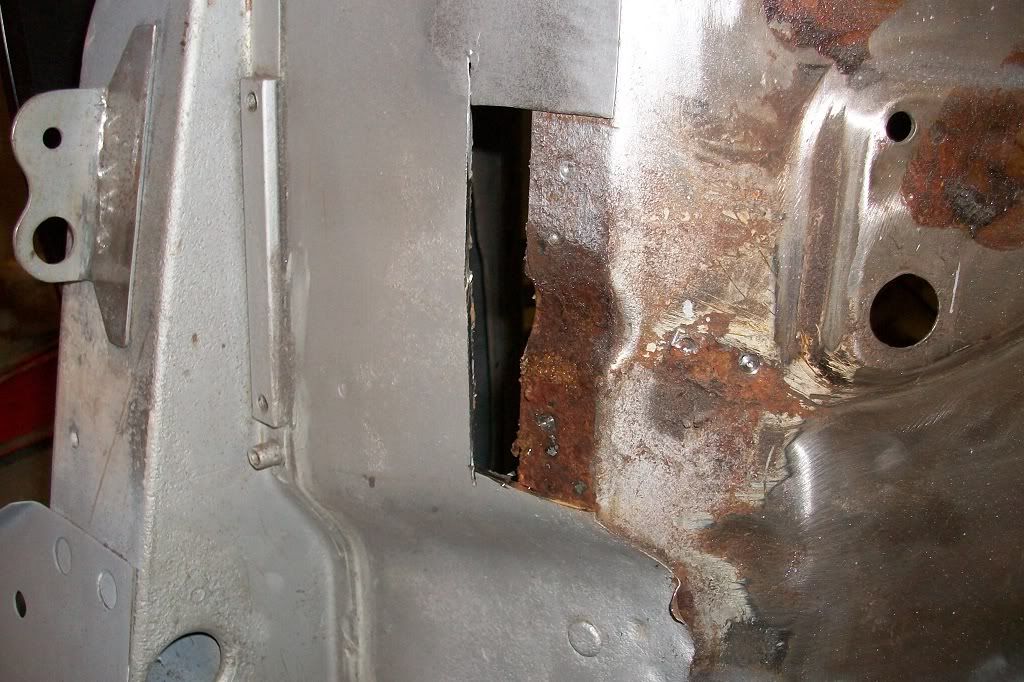
Cut the other side out and removed the rust.
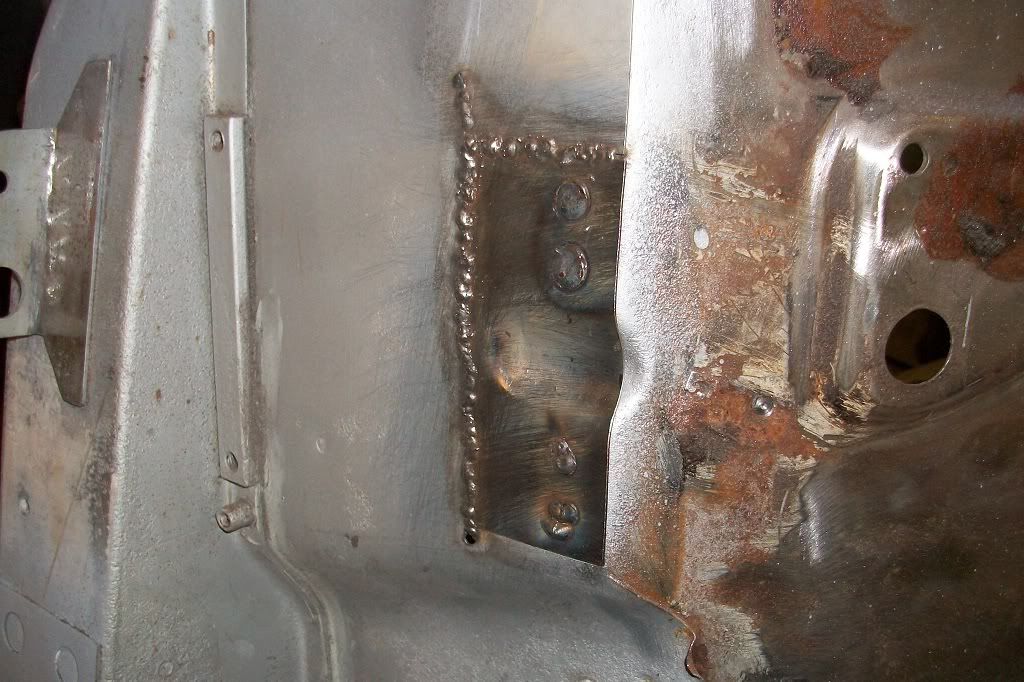
Made another repair piece.

Welded in.
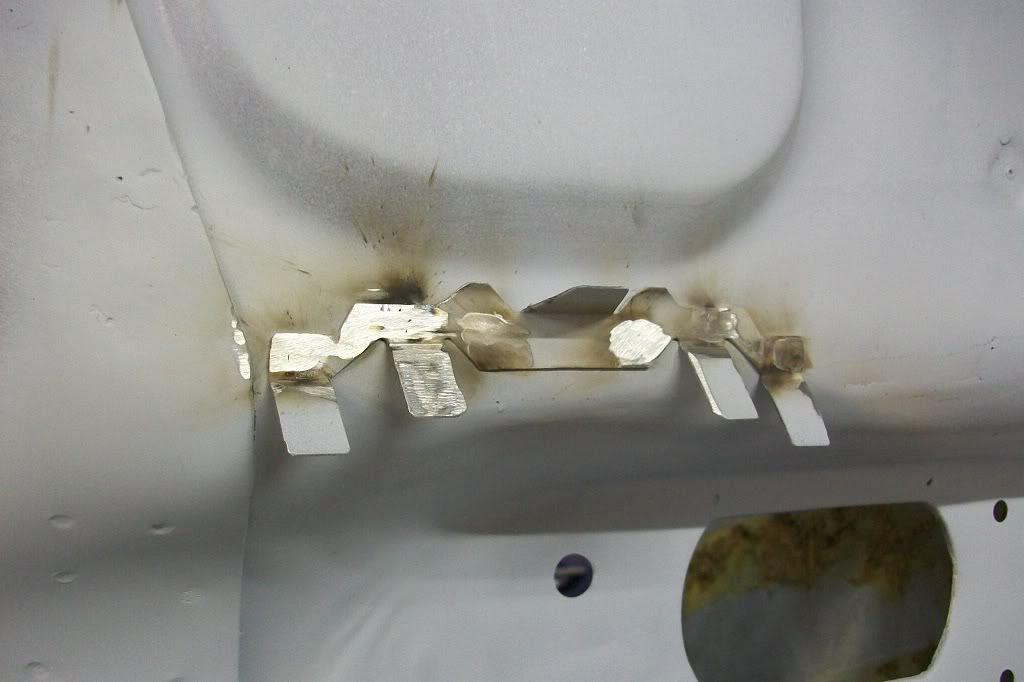
This next part has the bolts for the accelerator pedal, but as they were in a resonably good condition, I cut below them.
Small repair piece.
Welded up.
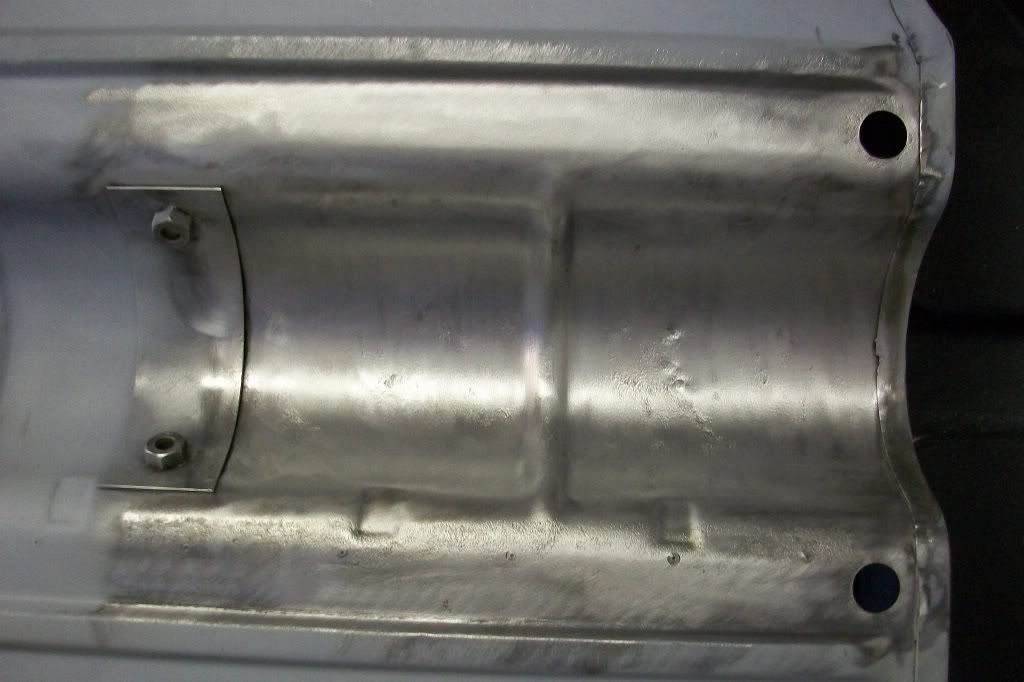
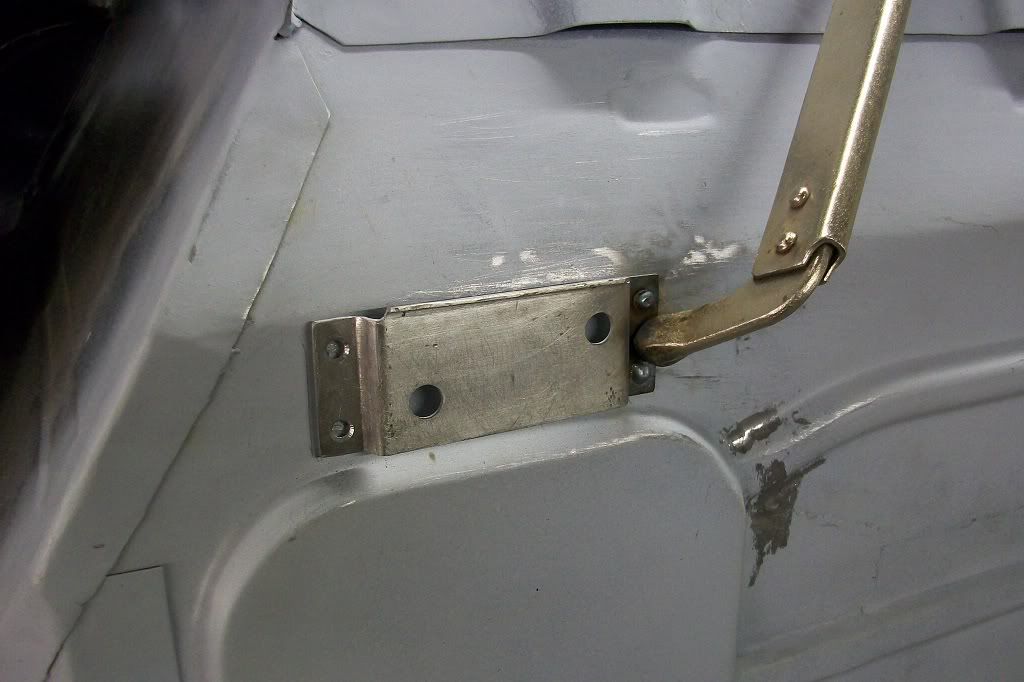
Ground down and cleaned up the toe board ready to refit the steering rack bracket.
Steering rack bracket cleaned up.
I then bolted it back in place, ready to weld up through the holes I had drilled, to remove the old spot welds.
Thanks
Cut the other side out and removed the rust.
Made another repair piece.
Welded in.
This next part has the bolts for the accelerator pedal, but as they were in a resonably good condition, I cut below them.
Small repair piece.
Welded up.
Ground down and cleaned up the toe board ready to refit the steering rack bracket.
Steering rack bracket cleaned up.
I then bolted it back in place, ready to weld up through the holes I had drilled, to remove the old spot welds.
Thanks


0 user(s) are reading this topic
0 members, 0 guests, 0 anonymous users


